Requirements
There are three minimum requirements for each
Excel homework assignment. First, a copy of the
original homework assignment, printed from the
assignment web page, must be included and placed
at the beginning of the submission. Second, a
printout of each spreadsheet in the assignment,
including student information, must be
submitted. Third, each student must upload their
spreadsheet to the correct dropbox on our
Canvas site (click here for
details
on submitting your spreadsheet electronically). The printouts and copies of the assignment must be stapled together
and placed in the assignment box during the first
ten minutes of class. The spreadsheet must be
uploaded to Canvas by 1:00 p.m. on the due
date. Late assignments will not be graded.
You must use the following file name
format to identify your spreadsheets: assignment
number followed by your last name. For example,
if Pat Smith submits a spreadsheet for
Assignment 2, the file should have the name
assignment_02_smith.xlsx
Groups
Unless stated otherwise, homework assignments can be done in groups of any
size. Indeed, you are strongly encouraged to work in small groups. Two or three
people in a group is an excellent size; each person has an opportunity to
contribute and learn. A group of 35 (the current enrollement of CIVL 1101) is a bit of a stretch.
While you may work in groups, each person must complete the
spreadsheet exercises and submit the assigned problems to Canvas.
Format
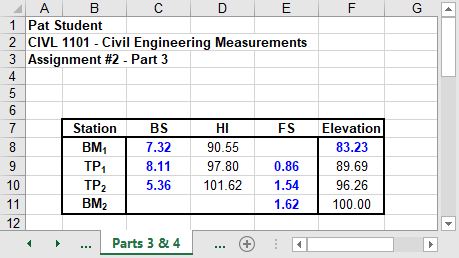
Your name, course information, and assignment number must be printed by the computer, not by hand,
at the top left corner of your assignment. This greatly reduces
errors during the grade recording process.
No grade will be given for handwritten names on assignments. This prevents
unprepared students from pressuring their friends to add their names to a
previously completed assignment.
If your assignment is more than one page long, the pages must be
stapled to prevent losing anything. Do not use paper clips; they
snag on other people's assignments.

Cell Formats and Alignment
Most of our assignments will require specific cell formats (e.g., thousands
of commas with no decimal point) and alignments (e.g., left justified). Each of
the major spreadsheet products allows you to alter these important cosmetic
characteristics of your output. Cell formatting is easy to do with Excel. Highlight the cells you want to re-format, choose the Format pull-down menu,
select Cells, and then choose your desired format (e.g., #,##0). You can also
handle some of this formatting with the button bar. (Beware of Excel's Comma
button. It adds a couple of blanks to the right of your number. This often fouls
up your desired alignment.)
You can use this same approach to change the
way dates are displayed. Highlight the
cells you want to re-format, choose the Format
pull-down menu, select Cells, and then choose
the Date category within the Number group.
Either select one of the existing format codes or
make up your own. For instance, the code mmmm d,
yyyy will display the whole month and the
four-digit year. If you change the four m's to
three m's, you will get the three-character
abbreviation for the month. If you change it to
two m's, you will get the month number (1 to
12). If you change the four y's to two y's, you
will not get the century portion of the year.
One glaring indicator of a novice user is
misaligned columns. Most spreadsheet products
use default cell alignments of left-justified
character values and right-justified numeric
values. This is fine unless you have a column of
numbers with a character column title. The
resulting jagged alignment always looks bad.
With Excel, you can modify the alignment of a
range of cells by simply highlighting them and
clicking the appropriate Left, Center, or Right
justification button.
Column Widths
Each column has a default width of about ten characters. This is probably
wide enough for most of your work. Occasionally, however, you will need to
adjust the width of a column to see a cell's entire contents. This is easily
done by clicking (and holding) the vertical line separating two column headings.
For instance, click the vertical line between the C and D headings if you want
to adjust the width of column C. Now, while continuing to hold down the mouse
button, you can drag the column to any desired width.
No credit will be given if your column widths
are not wide enough to view a cell's contents.
Page Layout
Previewing your output before printing can save time and money. To do this,
select the File pull-down menu and then the Print Preview option.
The Page Setup option enables you to adjust
the page scaling (e.g., 80%) and change the page
orientation from Portrait (8.5 by 11 inches) to
Landscape (11 x 8.5 inches). It also allows you
to define page labels (e.g., your name, the
date, and time), centering, margins, and other
settings.
Late Assignments
All assignments are collected at the beginning of class. Pleawse place them in the
collection box as you enter the classroom. Do not drop off an assignment at the
professor's office, and do not turn in an assignment via e-mail.
To be fair to all class members, no late
assignments are accepted without a
university-approved excuse. Notification must
occur within 24 hours.
Grading
Be careful. Reread the instructions before you turn in your assignment.
Points will be deducted for everything you fail to do. Common mistakes include
failing to align columns, displaying numeric values in the specified format,
adjusting columns to an appropriate width, and listing group member names in
alphabetic order.
If you have questions about the grading of a homework assignment, direct
them to Dr. Camp.
This website was originally
developed by
Charles Camp for
CIVL
1101.
This site is
Maintained by the
Department of Civil Engineering
at the University of Memphis.
Your comments and questions are welcomed.
|


